>>
30-MINUTE MEALS! Get the email series now →


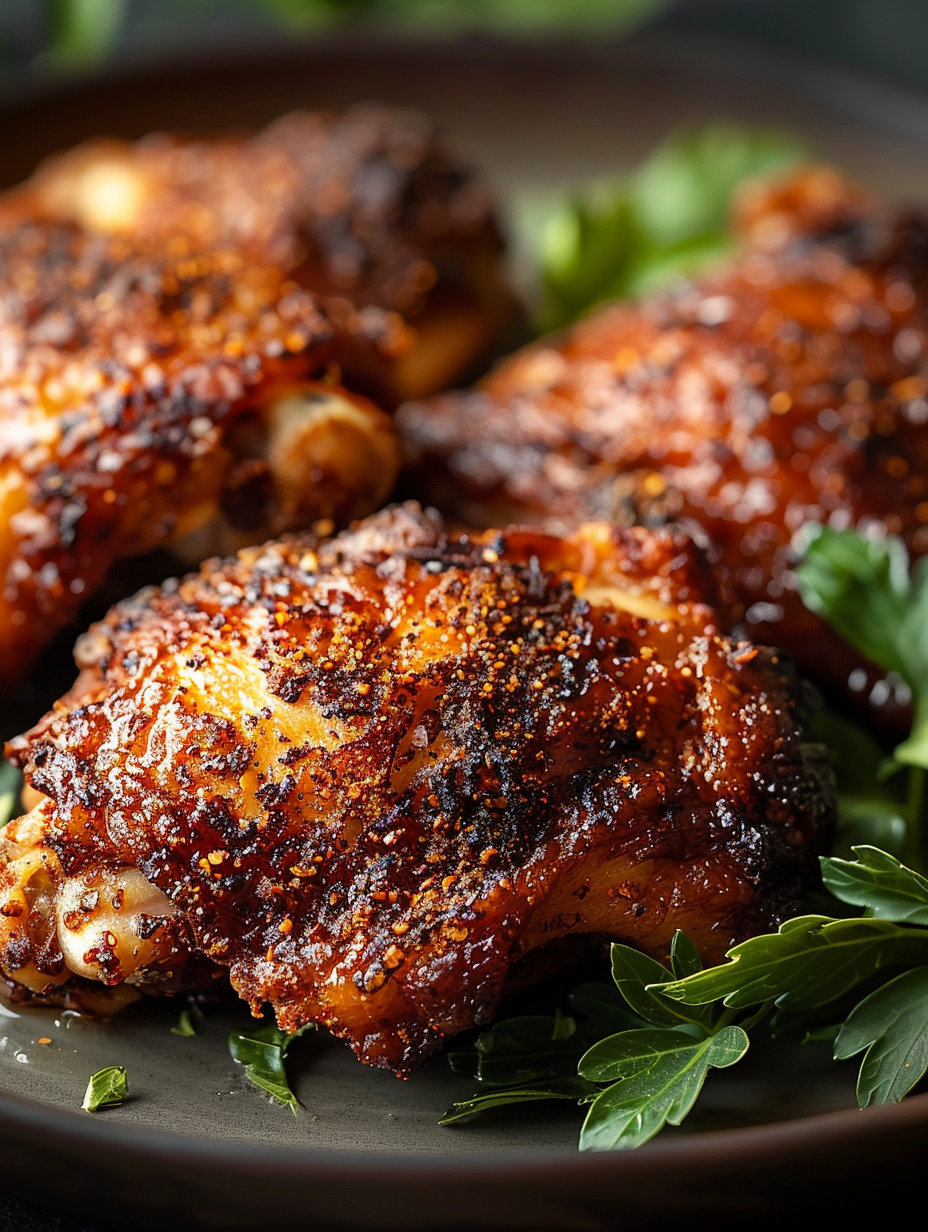
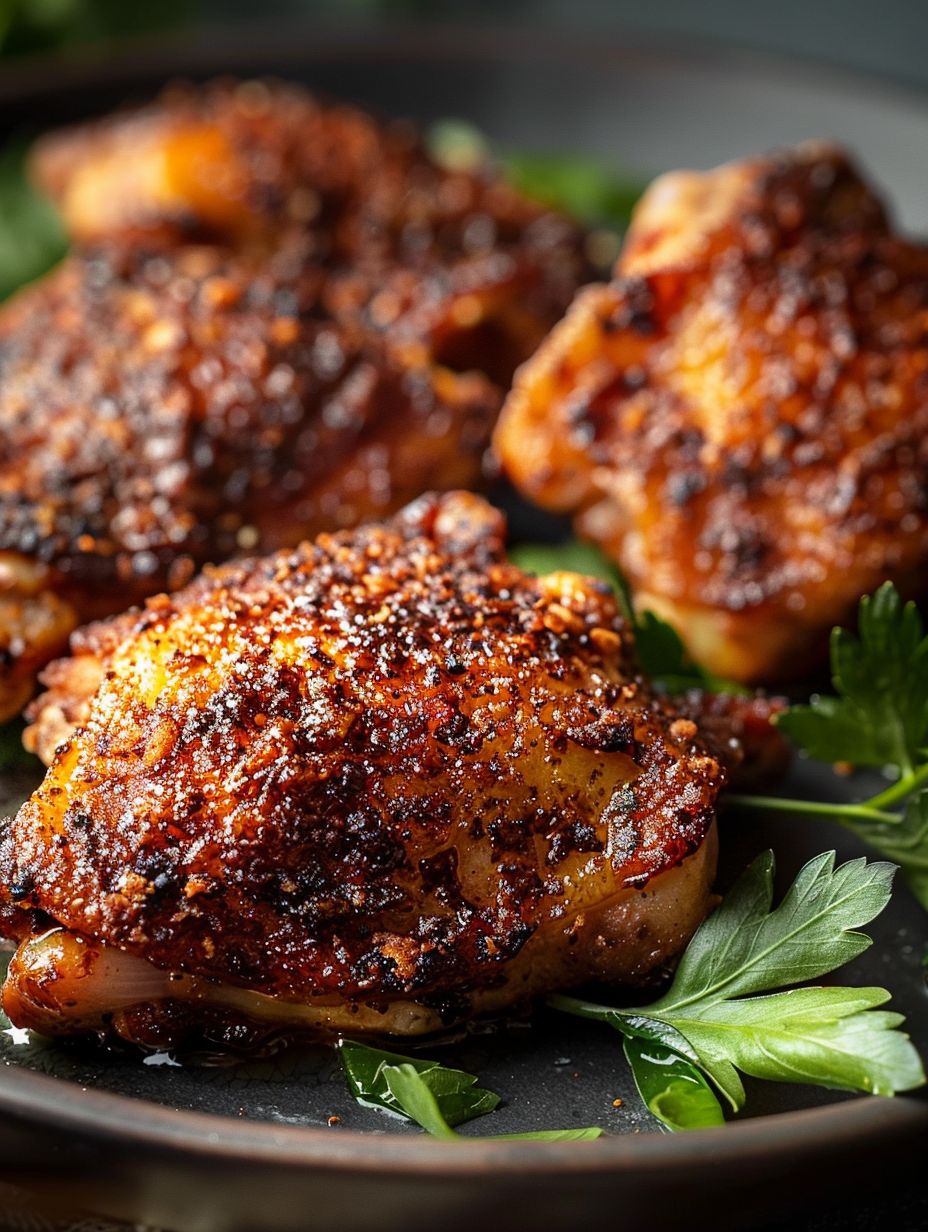
Bone-in, skin-on chicken thighs marinated in buttermilk, coated in panko and aromatic spices, then baked until deeply golden and irresistibly crisp.

This recipe for Crispy Irish Chicken Thighs is one of those weeknight winners that feels both familiar and a little celebratory. I first developed this method on a rainy March evening when I wanted something comforting but lighter than a deep fry. The combination of a quick buttermilk soak, a seasoned flour layer, and airy panko transforms humble bone-in thighs into pieces with a crunchy exterior and a juicy, tender interior. The skin renders and caramelizes in the oven, and the smoked paprika and thyme add a restrained, savory warmth that makes every bite interesting.
What makes these thighs special is the attention to simple technique: dry the skin thoroughly, give the buttermilk just enough time to tenderize, and use a wire rack so heat circulates evenly. I remember serving these to neighbors after a community gathering; everyone kept asking whether they were fried because the crust stayed crisp even after a short rest. This version is perfect for casual dinners, potlucks, or an easy Sunday supper when you want something reliably delicious without fuss.
I first served this at a casual dinner with mashed potatoes and a simple green salad; my aunt declared the crust “perfectly rustic,” and my husband still asks for these whenever it’s rainy. The combination of smoky paprika and thyme always draws compliments, and the method is forgiving—perfect if you’re new to working with bone-in pieces.
My favorite aspect is how reliably this method produces deep browning without frying. Once, after a late soccer game, I assembled these quickly and popped them in the oven; by the time everyone was showered and ready, the house smelled like a small Irish tavern—smoky, herby, and cozy. Leftovers heated in a hot oven regained much of their original charm, making this a go-to when I need both ease and company-pleasing results.
Cool any leftovers completely before refrigerating in an airtight container; they will keep for 3–4 days. To freeze, place cooled thighs on a sheet pan and freeze until firm, then transfer to a freezer-safe bag and store for up to 3 months. When reheating, use a preheated 375°F oven on a wire rack set over a baking sheet for 12–18 minutes. This method restores crispness far better than the microwave. Avoid stacking pieces when storing to prevent the coating from softening against other surfaces.
For a dairy-free version, replace buttermilk with 1 cup unsweetened soy or almond milk mixed with 1 tablespoon white vinegar—allow it to sit for 5 minutes to thicken. Swap melted butter for 2 tablespoons olive oil. For gluten-free, use certified gluten-free panko and a 1:1 gluten-free flour blend. If you prefer more herb brightness, replace dried thyme with a tablespoon of chopped fresh parsley and a teaspoon of lemon zest added to the panko.
These thighs pair beautifully with mashed potatoes or colcannon for an Irish-inspired plate, or serve alongside roasted root vegetables and a crisp green salad for balance. Garnish with lemon wedges, chopped parsley, or a drizzle of mustard-mayo for dipping—those small acidic hits cut through the richness. For a casual spread, offer pickles and a tangy slaw to add texture and brightness.
While not a traditional Irish recipe, this preparation borrows the spirit of rustic Irish cooking: straightforward, ingredient-forward, and focused on making the most of good poultry. Smoked paprika introduces a subtle smoky edge reminiscent of charred or hearth-cooked flavors; thyme is a classic herb in British and Irish kitchens. The result is a modern, oven-friendly take that honors simple, robust flavors.
In spring, add fresh parsley and lemon zest to the panko for a brighter finish. In autumn, fold a tablespoon of finely grated aged cheddar into the panko for added richness. For holiday meals, increase dried thyme to 1 1/2 teaspoons and add a pinch of ground mustard to the flour mixture to create a more savory, celebratory crust.
Coat the thighs and place them on parchment-lined trays, then refrigerate uncovered for up to 24 hours; this both flavors and firms the coating so you can bake straight from the fridge. Alternatively, assemble and freeze raw on trays, then transfer to freezer bags; bake from frozen at 425°F for about 50–60 minutes, checking internal temperature. Portion into meal-prep containers with roasted vegetables and a wedge of lemon for quick lunches.
Whether you make these for a family dinner or a friendly gathering, the technique is forgiving and the results are reliably satisfying. Try them once and they’ll become a regular in your rotation—simple, crisp, and full of comforting flavor.
Pat the chicken skin completely dry before marinating to ensure the skin renders and crisps during baking.
Use a wire rack over a baking sheet so hot air circulates and the underside stays crisp.
Reheat leftovers in a 375°F oven on a rack to restore texture; microwaving makes the crust soggy.
This nourishing crispy irish chicken thighs recipe is sure to be a staple in your kitchen. Enjoy every moist, high protein slice — it is perfect for breakfast or as a wholesome snack any time.
This Crispy Irish Chicken Thighs recipe makes perfectly juicy, tender, and flavorful steak every time! Serve with potatoes and a side salad for an unforgettable dinner in under 30 minutes.
Pat thighs dry with paper towels and season both sides with 1 teaspoon salt and 1/2 teaspoon black pepper, rubbing into the skin and under where possible.
Place thighs in a shallow dish, pour 1 cup buttermilk over them, and refrigerate for 30 minutes to 8 hours to tenderize.
Whisk flour with the remaining salt and pepper, smoked paprika, thyme, and garlic powder. Place panko in a separate bowl for dredging.
Remove thighs from buttermilk, shake off excess, dredge in seasoned flour, then press into panko. Place on a wire rack and chill uncovered for 15–30 minutes to set the coating.
Preheat oven to 425°F. Brush each thigh with melted butter or olive oil and bake for 30–40 minutes until internal temperature reaches 165°F and skin is deeply golden. Rest 5–7 minutes before serving.
Last Step: Please leave a rating and comment letting us know how you liked this recipe! This helps our business to thrive and continue providing free, high-quality recipes for you.
Leave a comment & rating below or tag
@veralkitchen on social media!

A decadent, crowd-pleasing layered casserole with sausage, bacon, tender hash browns, and a creamy ranch-egg custard topped with melty cheddar.
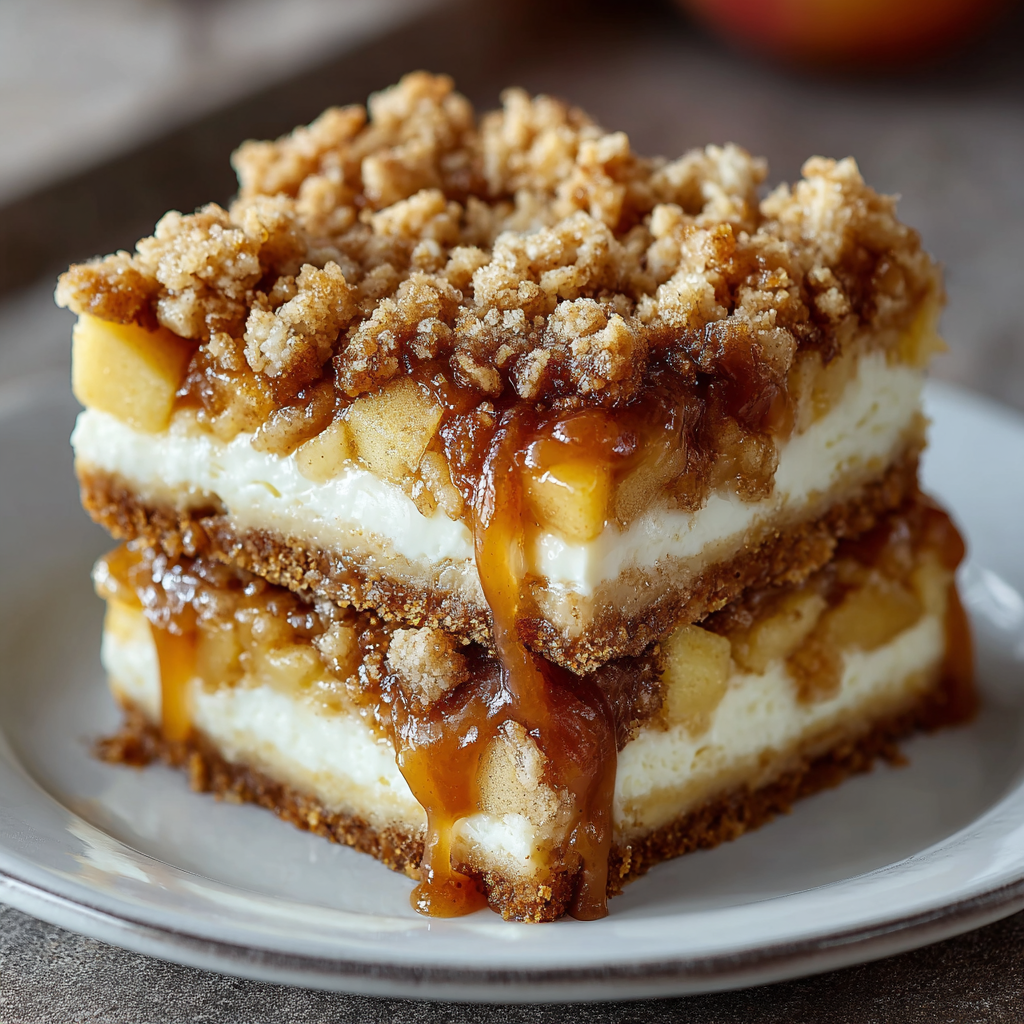
Buttery crust, a creamy cheesecake center, cinnamon-scented apples, and a crunchy oat topping—these bars are a brunch-ready hybrid dessert that’s irresistible.

A warm, comforting apple crumble with a buttery, crumbly topping and tart-sweet Granny Smith filling—perfect with a scoop of vanilla ice cream.
Leave a comment & rating below or tag @veralkitchen on social media!
Enjoyed this recipe? Share it with friends and family, and don't forget to leave a review!
This recipe looks amazing! Can't wait to try it.
Comments are stored locally in your browser. Server comments are displayed alongside your local comments.
Quick and easy dinner ideas delivered to your inbox.